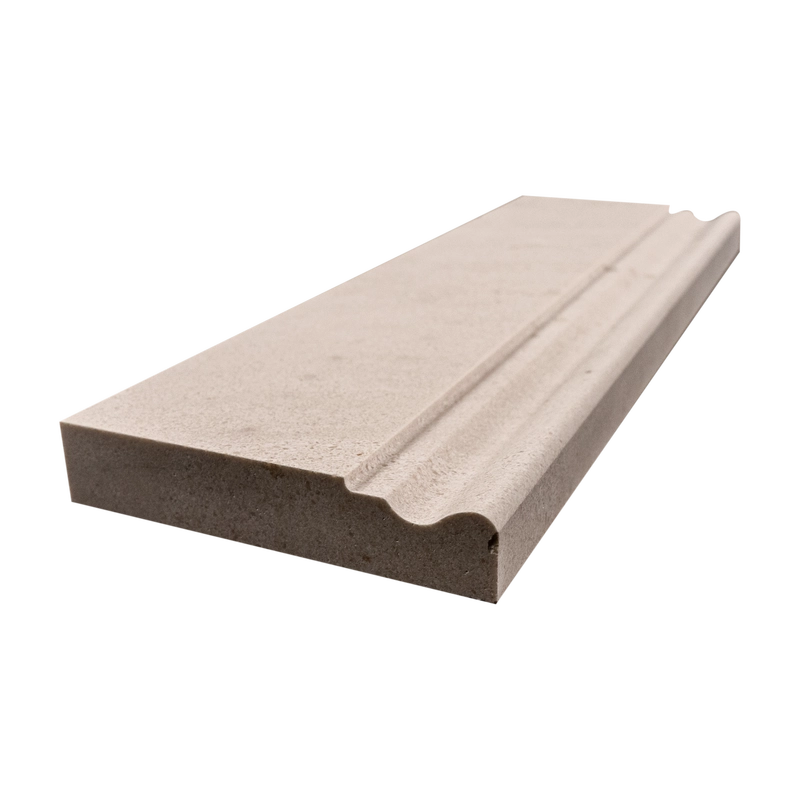
Limestone Baseboard Trim 4″x12″ – Honed Beige Accent
Add a refined finishing touch to your interiors with the 4″x12″ Honed Beige Limestone Baseboard Trim. Crafted from premium beige limestone, this trim offers a smooth, matte surface that creates a subtle yet elegant transition between walls and floors. Its warm, natural tones bring a soft, inviting feel to both contemporary and traditional spaces.
Ideal for pairing with limestone flooring or wall tiles, this baseboard protects walls from scuffs while enhancing the overall design. The honed finish highlights the stone’s natural texture, providing a sophisticated matte look that blends seamlessly with surrounding materials.
Key Features:
Material: Natural beige limestone
Finish: Honed – smooth, matte texture
Color: Warm beige with natural variation
Size: 4″ x 12″ (10.2 cm x 30.5 cm)
Application: Baseboard trim for residential and commercial interiors
Style: Straight-edge profile for clean, architectural lines
Perfect for kitchens, bathrooms, living rooms, or commercial spaces, this limestone baseboard trim combines durability, elegance, and seamless integration with stone surfaces for a polished, cohesive finish.
Installation Guide – Limestone Baseboard Trim (4″x12″ Honed)
Step 1 — Surface Preparation: Clean and Level
Ensure wall and floor surfaces are clean, dry, and structurally sound.
Complete installation of surrounding floor tiles before placing the baseboard trim.
Remove dust, adhesive residue, or paint flakes from the lower wall area.
Step 2 — Dry Layout: Plan and Align
Dry-lay trim pieces to check color consistency and natural variations.
Mark a straight horizontal guide line approximately 4 inches above the floor for precise alignment.
Use a wet saw with a diamond blade to cut pieces to exact size.
Step 3 — Adhesive Application: Secure Placement
Recommended Adhesives:
Instructions:
Apply a layer of thin-set mortar to the back of each trim piece with a margin trowel.
Back-butter each piece for full contact and press firmly along the guide line.
Support vertical or unsupported pieces with painter’s tape while curing (minimum 24 hours).
Step 4 — Grouting: Finish Seamlessly
Allow adhesive to cure completely before grouting (at least 24 hours).
Use unsanded grout for narrow joints to prevent scratching the honed surface.
Remove excess grout immediately with a damp sponge and buff the surface after 30–45 minutes with a soft cloth.
Step 5 — Sealing: Protect the Stone
After grout has fully cured (approx. 72 hours), apply a penetrating sealer suitable for honed limestone.
Reseal periodically based on foot traffic and moisture exposure.
Maintenance Tips
Clean only with pH-neutral stone cleaners.
Avoid acidic, bleach-based, or abrasive products that can damage the honed finish.
Dust or wipe gently to maintain the stone’s natural texture and appearance.
⚠️ Important Note:
Limestone is a natural material with unique variations in color and texture. Always dry-lay and inspect pieces prior to installation. Stonemarket USA is not responsible for installation mistakes or natural stone variations.