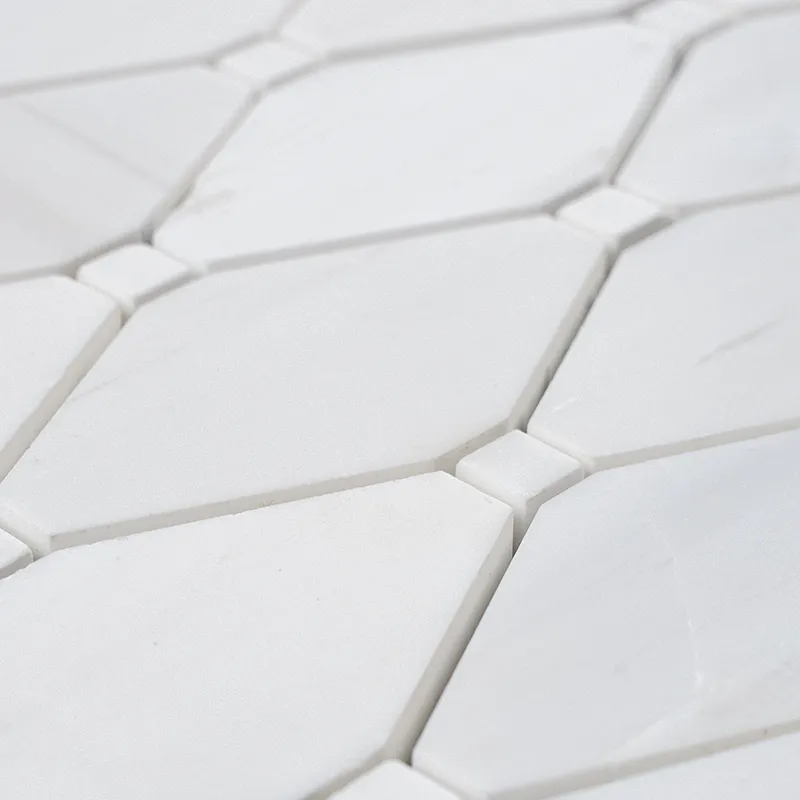
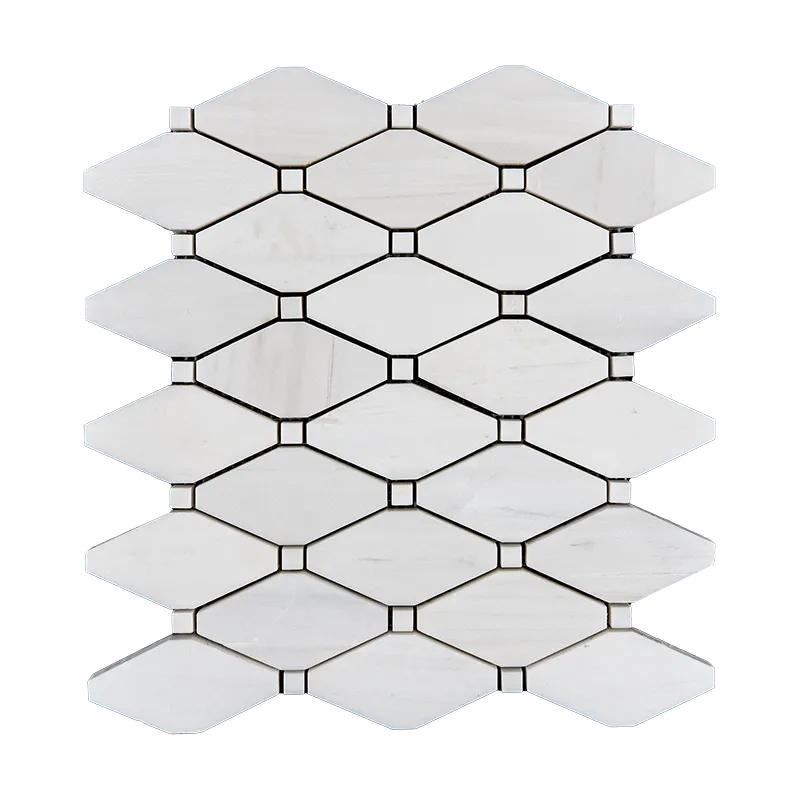
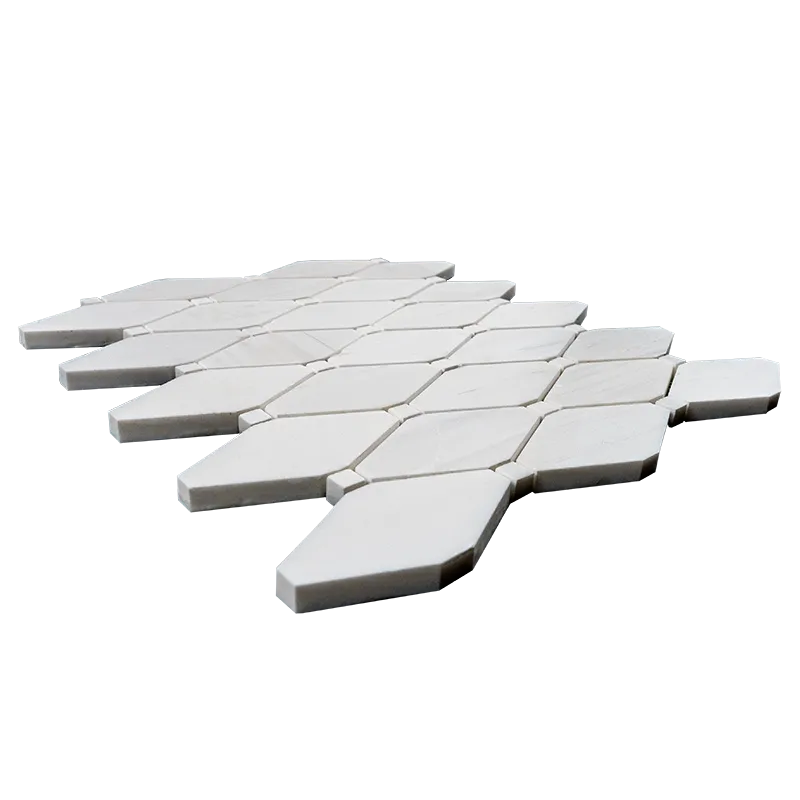
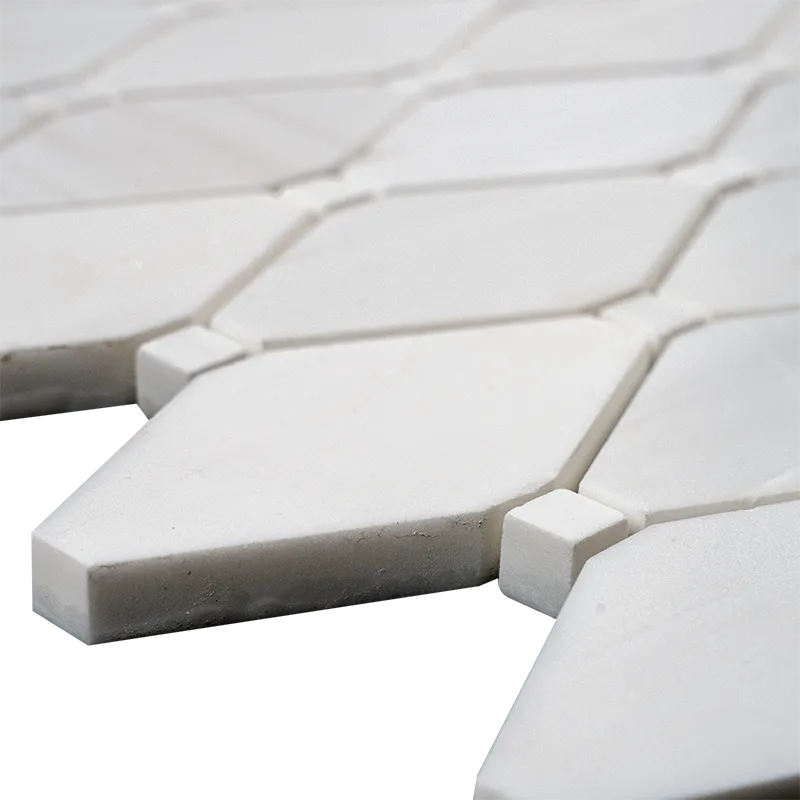
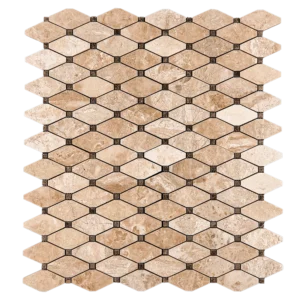
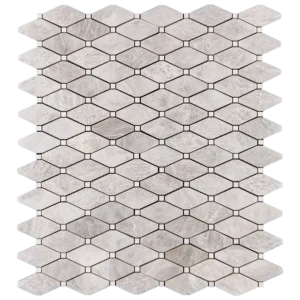
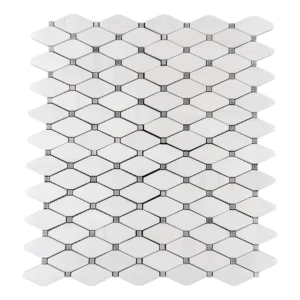
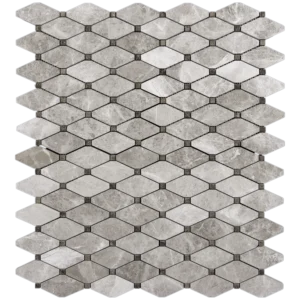
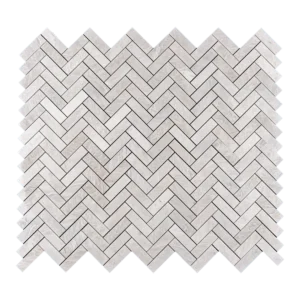
Elegant White Dolomite Clipped Diamond Mosaic – Polished Finish
Elevate your interiors with the White Dolomite Clipped Diamond Mosaic. Crafted from premium natural dolomite marble, this mosaic features a striking clipped diamond pattern and a polished surface that exudes sophistication. Its crisp white tones with subtle veining bring a sense of luxury and tranquility to both modern and classic spaces.
Perfect for bathrooms, kitchen backsplashes, fireplace surrounds, or eye-catching feature walls, this versatile tile adds depth and movement to any room. The polished finish enhances light reflection, making spaces feel brighter and more open, while the geometric pattern transforms ordinary walls into captivating focal points.
Why Choose This Mosaic Tile?
Elegant clipped diamond design that complements diverse styles and color palettes
Polished surface highlighting the natural beauty of the stone
Mesh-mounted sheets for easy installation and perfect alignment
Durable and moisture-resistant, ideal for high-traffic or wet areas
Low maintenance for lasting beauty with minimal effort
Product Details
Material: Natural Dolomite Marble
Finish: Polished
Color: White with subtle veining
Pattern: Clipped Diamond Mosaic
Sheet Size: 10.4″ x 12″ (26.5 x 30.5 cm)
Weight per Box: Approx. 5.02 lbs
Packaging: 5 sheets per box
Use: Indoor wall applications (wet or dry areas)
Recommended Applications
Bathroom walls and shower areas
Kitchen backsplashes and accent walls
Fireplace surrounds and statement features
Entryways and commercial lobbies
Short Description
The White Dolomite Clipped Diamond Mosaic combines polished elegance with a unique geometric design. Ideal for kitchens, bathrooms, and feature walls, it transforms any space with timeless beauty and refined sophistication.
White Dolomite Clipped Diamond Mosaic Tile – Polished Finish
Professional Installation Guide for Lasting Beauty
Ensure your White Dolomite Clipped Diamond Mosaic Tile maintains its elegance and durability by following these expert installation steps. Proper preparation and care preserve the polished surface and geometric clipped diamond pattern.
Step 1: Surface Preparation – Build a Strong Base
Start with a clean, dry surface free from dust, grease, or soap residue.
Confirm the substrate is level, solid, and free of cracks or loose areas.
Apply a waterproof membrane in wet zones such as showers or backsplashes.
Remove any baseboards or obstacles to ensure smooth installation.
Level uneven areas with a self-leveling compound if necessary.
Step 2: Layout Planning – Ensure Symmetry
Measure and mark the center point to achieve a balanced layout.
Use chalk lines to create a grid guiding sheet placement.
Dry-lay the sheets to preview alignment of the clipped diamond pattern.
Adjust placement to avoid tiny edge cuts.
Use 1.5–3mm spacers for consistent grout lines.
Step 3: Adhesive Application – Choose the Right Mortar
Recommended thin-set mortars: Mapei, Laticrete, Ardex
Mix only what can be used within 30 minutes.
Apply mortar with the flat side of a 1/4″ notched trowel, then comb at a 45° angle.
Back-butter each sheet to improve adhesion and minimize voids.
Step 4: Cutting & Fitting – Keep the Pattern Flawless
Use a wet saw with a diamond blade for precise, chip-free cuts.
Mark cuts carefully with pencil or wax marker.
Smooth sharp edges with a rubbing stone before grouting.
Dry-fit all pieces to ensure seamless alignment.
Step 5: Setting the Tiles – Maintain Perfect Alignment
Begin at the center and work outward for a balanced appearance.
Press each mesh-backed sheet gently into the thin-set with a slight twisting motion.
Avoid sliding sheets after placement to protect the clipped diamond design.
Use spacers to maintain even gaps between sheets.
Lightly tap with a rubber mallet as needed to level.
Remove excess mortar immediately with a damp sponge.
Allow adhesive to cure for at least 24 hours before grouting.
Step 6: Grouting & Sealing – Protect Your Investment
Use unsanded grout to prevent scratching the polished surface.
Apply grout diagonally with a rubber float for uniform coverage.
Wipe excess grout promptly with a damp sponge to prevent haze.
After 15–20 minutes, buff gently with a soft cloth.
Let grout cure for at least 72 hours before sealing.
Apply a pH-neutral, penetrating stone sealer to guard against moisture and stains.
Maintenance Tips
Clean with a pH-neutral, stone-safe cleaner to maintain shine.
Avoid acidic or abrasive cleaners that can damage dolomite marble.
Reapply sealer periodically depending on usage.
Use felt pads under furniture or fixtures near tiled areas to prevent scratches.