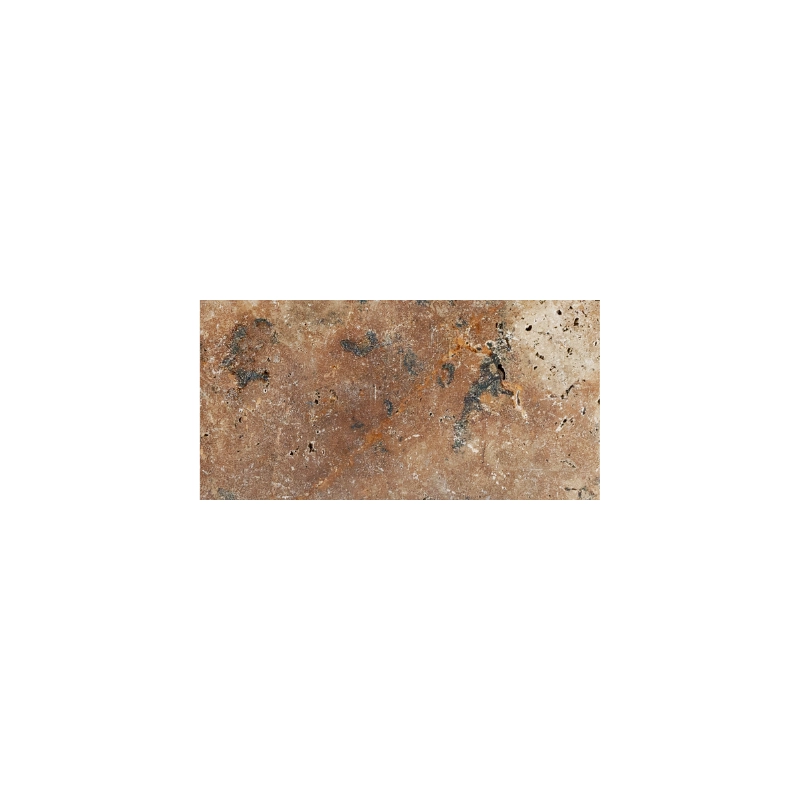
Country Classic 6″x12″ Tumbled Travertine Paver – Warm, Rustic Elegance
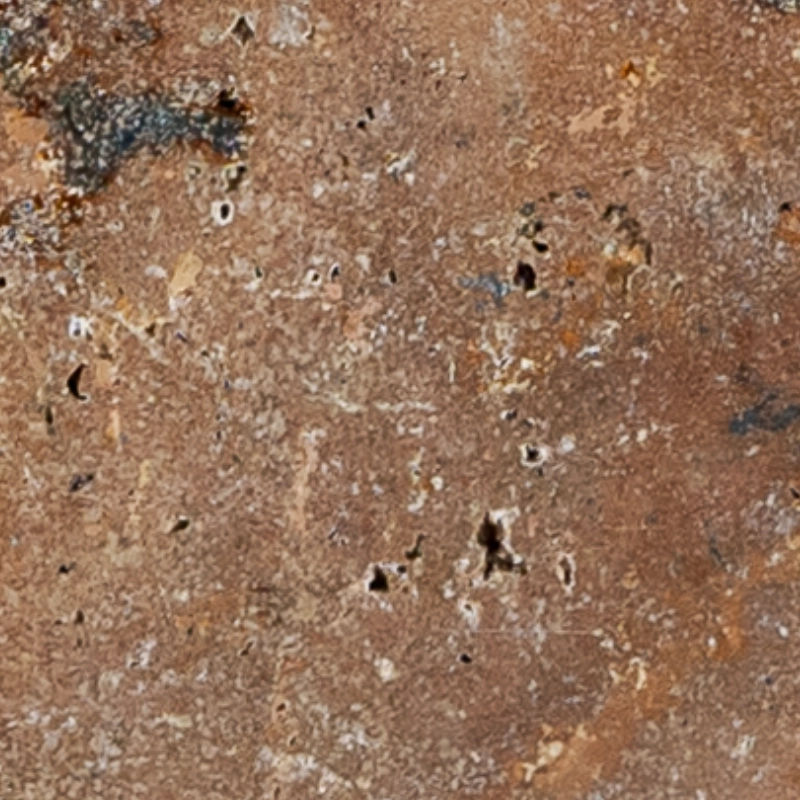
The Country Classic 6×12 Tumbled Travertine Paver brings natural warmth and timeless charm to any outdoor setting. Its soft beige and earthy tones, combined with a tumbled finish, create a slip-resistant, aged look that enhances patios, walkways, and garden areas. Each piece features subtle color and texture variations, giving your space a handcrafted, unique appearance.
Made from high-quality natural travertine, this paver is built to withstand heavy use and all weather conditions. The versatile 6″x12″ size allows for a variety of patterns, including running bond, staggered rows, and herringbone layouts, offering endless design possibilities for both rustic and contemporary spaces.
These pavers remain cool underfoot in the sun and drain efficiently after rain. Regular sealing boosts stain resistance and simplifies maintenance, ensuring long-lasting beauty with minimal effort.
Perfect for patios, pool decks, garden paths, or courtyards, the Country Classic 6×12 Tumbled Travertine Paver combines durability, style, and safety, making it ideal for both residential and commercial projects.
Key Features
Material: Premium natural travertine
Color: Warm beige and earthy tones with subtle variation
Finish: Tumbled for rustic texture and slip resistance
Size: 6″x12″
Edge: Tumbled for an authentic, aged look
Applications: Patios, walkways, pool surrounds, and garden paths
Installation Guide – Country Classic 6″x12″ Tumbled Travertine Paver
Important Notice
This guide focuses solely on the paver installation phase. Ensure sub-base and bedding layers are properly prepared by qualified professionals before beginning.
Step 1: Dry Layout & Planning
Lay out the pavers without adhesive to check natural color, veining, and texture.
Arrange in your preferred pattern—running bond, herringbone, basketweave, or other—for balanced visual appeal.
Mark straight, consistent rows using chalk lines or a laser level as reference.
Step 2: Paver Placement
Place each 6″x12″ paver carefully on the prepared bedding surface.
Maintain consistent joint spacing of 1/8″–1/4″.
Tap lightly with a rubber mallet to seat the pavers and ensure level alignment.
Step 3: Cutting & Edge Finishing
Use a wet saw with a diamond blade rated for travertine for accurate cuts.
Support small-format pavers securely during cutting to prevent edge chipping.
Smooth cut edges with a file or rubbing stone to preserve the tumbled texture.
Step 4: Joint Filling
Fill joints with polymeric sand or a travertine-compatible joint filler.
Compact gently and sweep away excess material.
If using polymeric sand, lightly mist to activate bonding following manufacturer instructions.
Step 5: Sealing & Maintenance
Once installation is fully dry, apply a breathable, penetrating travertine sealer.
Reapply every 1–2 years depending on traffic and weather exposure.
Clean with pH-neutral stone cleaners; avoid acidic or abrasive products.
Disclaimer
Travertine is a natural stone with inherent color variation, surface pits, and veining. These are natural characteristics, not defects. Always dry-lay and inspect pavers prior to installation. Professional installation is recommended to ensure longevity, durability, and optimal appearance.