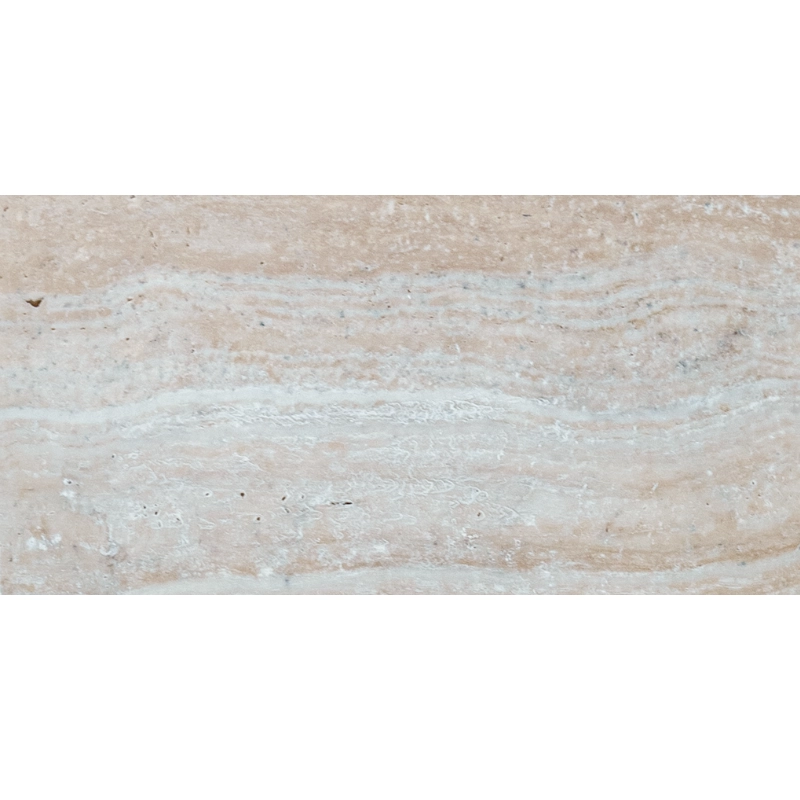
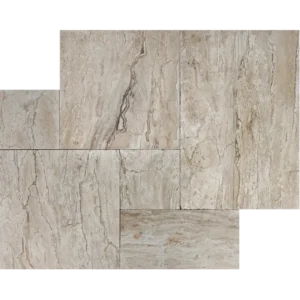
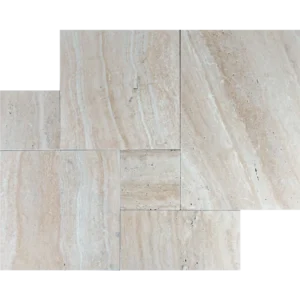
Desert Bloom 12″x24″ Tumbled Travertine Paver – Rustic Elegance for Outdoor Spaces
Bring lasting style and functionality to your outdoor areas with the Desert Bloom 12″x24″ Tumbled Travertine Paver. Its warm ivory-beige tones with subtle variations create a natural, inviting look, while the tumbled finish adds rustic charm and slip resistance for safer use in high-traffic or wet areas.
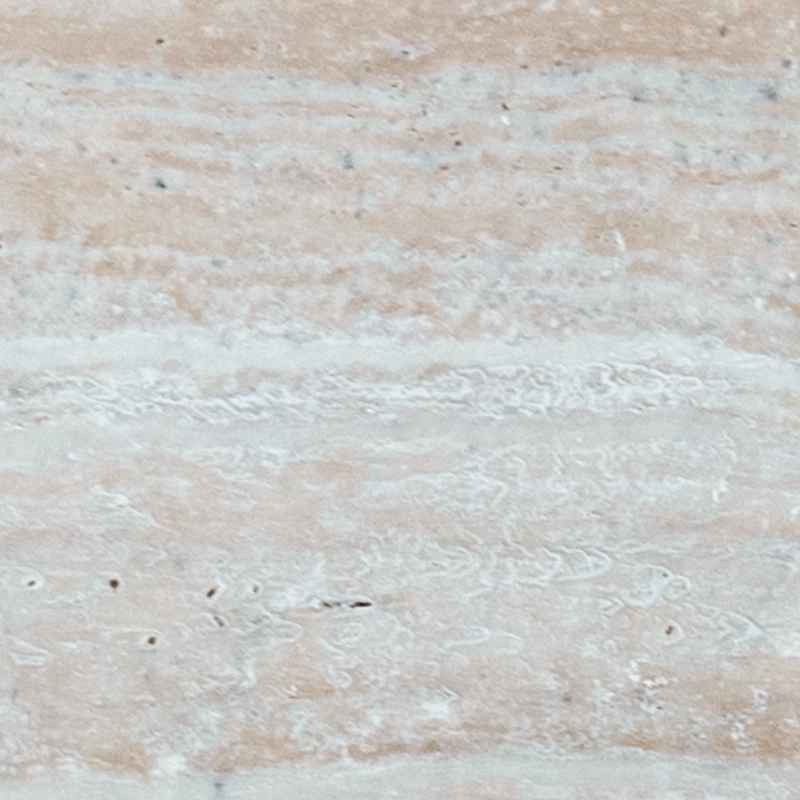
Crafted from premium natural travertine, this paver withstands changing weather and daily wear, maintaining its beauty over time. Each piece features soft veining and natural texture, ensuring every installation is unique. Ideal for patios, pool decks, walkways, and outdoor entertainment spaces, it combines elegance with durability.
The 12″x24″ rectangular format allows for versatile layout options, including linear, staggered, or herringbone patterns, giving your project a professional and visually appealing finish. Perfect for both residential and commercial landscapes, these pavers effortlessly blend rustic beauty with long-lasting performance.
Key Features:
Material: Premium natural travertine
Color: Warm ivory-beige with subtle variations
Finish: Tumbled for rustic texture and slip resistance
Size: 12″x24″ (nominal)
Edge: Tumbled for a natural, aged look
Applications: Patios, pool decks, walkways, garden paths
Stone Type: Travertine
Why Choose Desert Bloom 12″x24″?
These pavers add warmth, safety, and timeless beauty to any outdoor design. Their natural texture and soft color palette create inviting, elegant spaces that last for years.
Installation Guide – Desert Bloom 12″x24″ Tumbled Travertine Paver
Important Notice
This guide focuses only on paver placement. Base preparation and leveling must be completed by qualified professionals before installation.
Step 1: Dry Layout & Planning
Lay out pavers without adhesive to inspect natural color, veining, and texture.
Arrange in visually balanced patterns such as running bond or staggered grids.
Confirm the design flow and mark alignment lines as needed for straight, consistent rows.
Step 2: Paver Placement
Carefully position each paver on the prepared bedding layer.
Maintain uniform joint spacing of 1/8″–1/4″ for a clean, consistent appearance.
Lightly tap with a rubber mallet to ensure proper seating and level alignment.
Step 3: Cutting & Adjustments
Use a wet saw with a diamond blade rated for travertine for precise cuts.
Handle large-format pavers carefully to prevent corner chipping or breakage.
Smooth any exposed cut edges for a natural, tumbled look.
Step 4: Joint Treatment
Fill all joints with polymeric sand or a travertine-compatible joint filler.
Gently compact the surface and sweep away excess material.
If using polymeric sand, lightly mist to activate bonding according to manufacturer instructions.
Step 5: Sealing & Maintenance
After installation is fully dry, apply a breathable, penetrating sealer suitable for exterior travertine.
Clean only with pH-neutral cleaners; avoid acidic or abrasive products.
Re-seal every 1–2 years depending on climate, exposure, and foot traffic.
Disclaimer
Travertine is a natural stone that may feature color variations, veining, and small surface pores—these are part of its unique character. Always dry-lay and inspect materials before final installation. Professional installation is recommended for best long-term performance and visual results.