Eterna Bianco Tile 12″x24″ Honed – Gray Marble with Straight Edge
Modern Simplicity with Natural Elegance
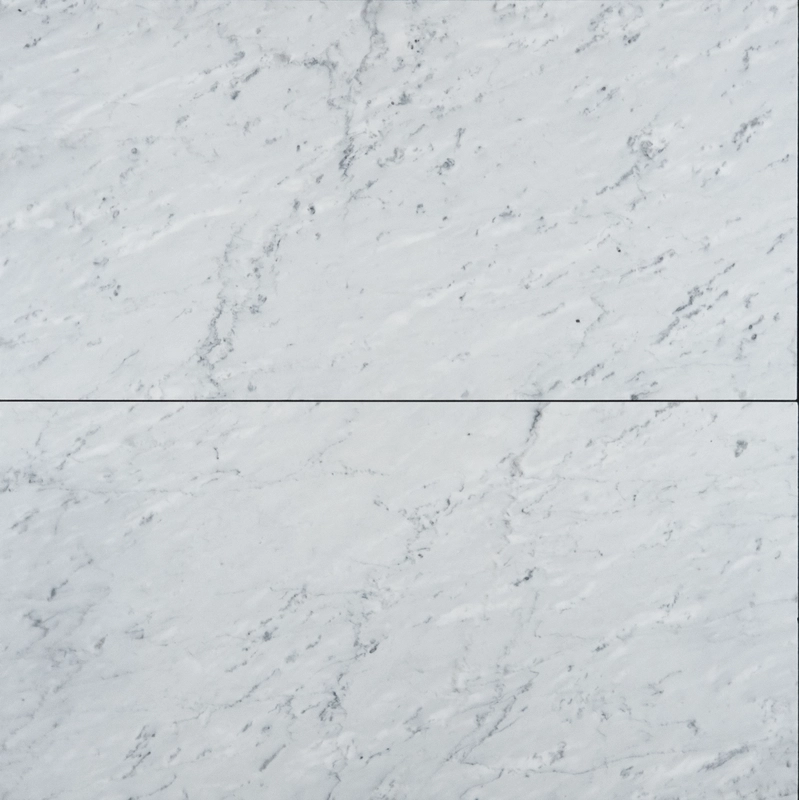
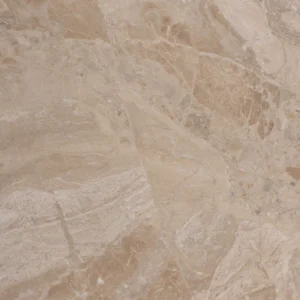
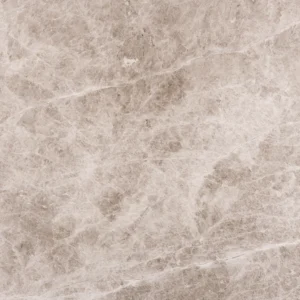
Elevate your space with the Eterna Bianco 12″x24″ Honed Tile, designed to bring balance and refined modern style. Its soft gray base, highlighted by delicate natural veining, offers a sophisticated yet subtle aesthetic. The honed, matte finish gently diffuses light, making it perfect for both cozy and open interiors.
With its 12″x24″ size and clean straight edges, this tile ensures a seamless layout. Ideal for minimalist floors, contemporary bathrooms, and feature walls, its neutral tones complement a variety of styles—from Scandinavian to industrial. Whether used alone or paired with contrasting materials, it creates a calm and cohesive atmosphere.
Eterna Bianco Tile – Key Features
Material: Premium gray marble
Finish: Honed – smooth, matte surface
Color: Cool gray with natural flowing veining
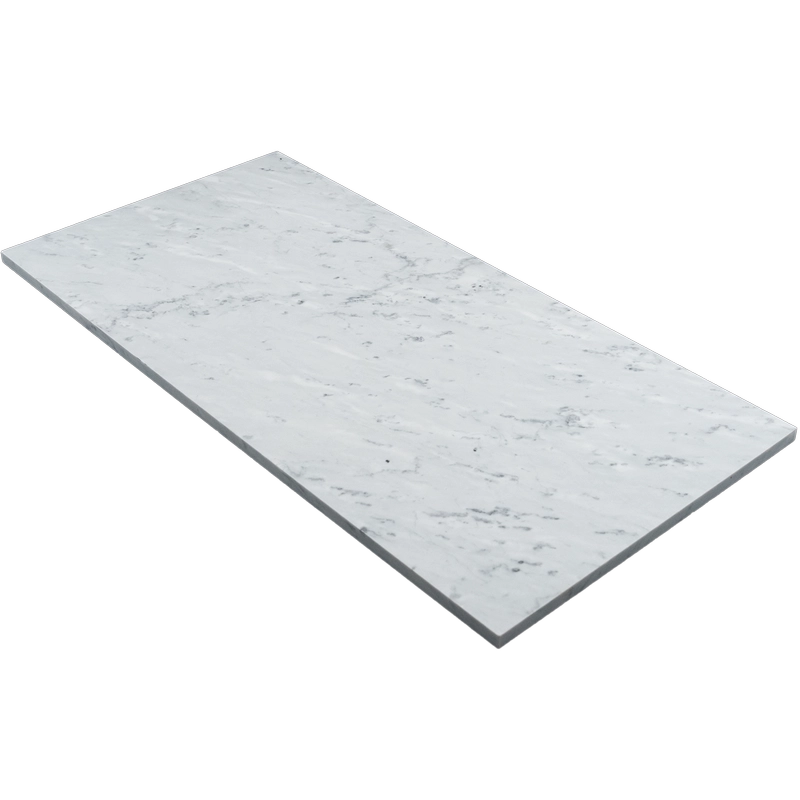
Size: 12″x24″ (30.5 x 61 cm)
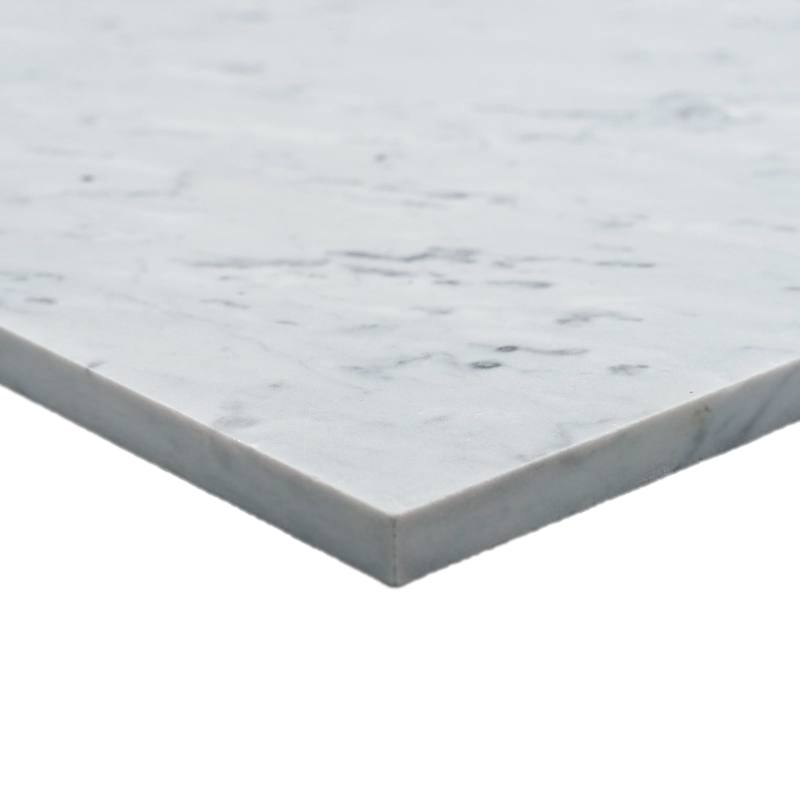
Thickness: 0.47″ (1.2 cm)
Edge Detail: Straight edge for precise alignment
Best For: Interior floors and walls, showers, vanities, and entryways
Design Suggestions
Pair the soft gray tones with brushed metal, light oak, or white accents to highlight its subtle elegance. For added contrast, use darker grout. The honed texture also makes it suitable for wet areas, offering practical slip resistance. From spa-like bathrooms to gallery-style walls, this tile introduces understated luxury wherever it’s applied.
Installation Guide – Step by Step
Step 1: Surface Preparation – Ensure Stability & Flatness
- Clean the substrate thoroughly, removing debris
Installation Guide – Step by Step
Step 1: Prepare the Surface – Ensure Stability & Flatness
Thoroughly clean the substrate, removing dust, grease, or leftover adhesives.
Check surface flatness with a 10-ft straightedge; aim for no more than 1/8″ deviation.
Apply a self-leveling compound if needed, especially for supporting large-format tiles.
In wet areas like showers or bathrooms, install a waterproof membrane for added protection.
Step 2: Plan the Layout – Balance & Vein Consistency
Mark centerlines to create a symmetrical layout and minimize awkward cuts.
Dry-lay tiles to evaluate the natural veining of the Eterna Bianco marble.
Mix tiles from multiple boxes to maintain consistent tone across the installation.
Maintain 1/16″–1/8″ grout joints for a clean, seamless look.
Step 3: Apply Mortar – Use a White Thin-Set
Recommended Mortars:
Instructions:
Spread mortar using a 1/2″ square-notched trowel.
Back-butter each tile to ensure complete contact and minimize voids.
Work in small sections to prevent the mortar from drying too quickly.
Step 4: Cutting & Fitting – Precision Matters
Use a wet saw with a diamond blade for clean, precise cuts.
Smooth visible cut edges with a marble polishing pad.
Dry-fit cut tiles before final placement to confirm alignment.
Step 5: Place the Tiles – Avoid Lippage
Use a tile leveling system to maintain even alignment and a flat surface.
Set tiles with gentle pressure, following chalk lines or spacers.
Remove excess mortar immediately with a damp sponge.
Allow thin-set to cure for at least 24 hours before grouting.
Step 6: Grouting & Sealing – Long-Term Protection
Pre-seal honed marble tiles with a penetrating sealer before grouting.
Use non-sanded grout to protect the honed surface from scratching.
Apply grout with a rubber float, working diagonally into the joints.
Wipe off residue promptly and buff haze after 20–30 minutes.
Once grout cures (typically 72 hours), re-seal the tile surface for added durability.
Maintenance Tips – Keep Tiles Looking New
Clean only with pH-neutral, stone-safe products.
Re-seal tiles every 6–12 months, depending on traffic and exposure.
Wipe spills immediately to prevent stains or etching.
Avoid abrasive pads or acidic cleaners.
Shipping & Packaging
Each 12″x24″ Eterna Bianco Honed Marble Tile is individually cushioned for safe transport. Inspect tiles before installation to ensure quality and uniformity.
Important Note
Eterna Bianco marble is natural, so veining and tone may vary. Dry-lay tiles and mix from multiple boxes for a balanced look. Stonemarket USA is not responsible for variations inherent in natural stone or installation outcomes.
, grease, or previous adhesives.
- Use a 10-ft straightedge to verify surface flatness within 1/8″.
- Apply self-leveling compound as needed for even large-format tile support.
- Use a waterproof membrane in wet areas like showers or bathrooms.
Step 2: Layout Planning – Symmetry & Tone Management
- Mark centerlines to ensure balanced layout and minimal awkward cuts.
- Dry-lay tiles to assess natural variation in the Eterna Bianco marble veining.
- Blend tiles from multiple boxes for consistent tone across the surface.
- Use **1/16″–1/8″ grout joints** to suit the straight edges and maintain a clean visual flow.
Step 3: Mortar Application – Choose White Thin-Set
Recommended Thin-Set Mortars:
- Mapei Ultraflex LFT White
- Laticrete 4-XLT White
- Ardex X5 or X77 White
Instructions:
- Spread mortar using a 1/2″ square-notched trowel.
- Back-butter each tile to ensure full contact and reduce voids.
- Apply adhesive in small sections to prevent premature setting.
Step 4: Cutting & Fitting – Accuracy is Key
- Use a wet saw with a diamond blade to make clean, accurate cuts.
- Polish any visible cut edges using a marble finishing pad.
- Dry-fit cut tiles before final installation to confirm alignment.
Step 5: Tile Placement – Prevent Lippage
- Use a tile leveling system to ensure smooth alignment and flat installation.
- Set tiles with light pressure and align carefully along chalk lines or spacers.
- Clean off excess mortar promptly with a damp sponge.
- Allow thin-set to cure for 24 hours before grouting.
Step 6: Grouting & Sealing – Protect the Surface
- Pre-seal honed marble tiles with a penetrating sealer before grouting.
- Use non-sanded grout to protect the honed surface from abrasion.
- Apply grout using a rubber float and work diagonally into joints.
- Clean off residue quickly and buff haze after 20–30 minutes.
- After grout cures (usually 72 hours), re-seal the tile surface for long-term protection.
Maintenance Tips – Preserve the Look
- Clean with pH-neutral, stone-safe products only.
- Re-seal tiles every 6–12 months depending on foot traffic and exposure.
- Wipe spills immediately to prevent stains or etching.
- Avoid abrasive pads or acidic cleaners.
Shipping & Packaging
Each 12″ x 24″ Eterna Bianco Honed Marble Tile is individually cushioned and protected for safe transport. Inspect before installation to confirm quality and consistency.
Important Note
Natural marble like Eterna Bianco may feature tonal and veining variation. Dry-lay before installation and blend tiles for visual balance. Stonemarket USA is not responsible for installation or natural variation issues.