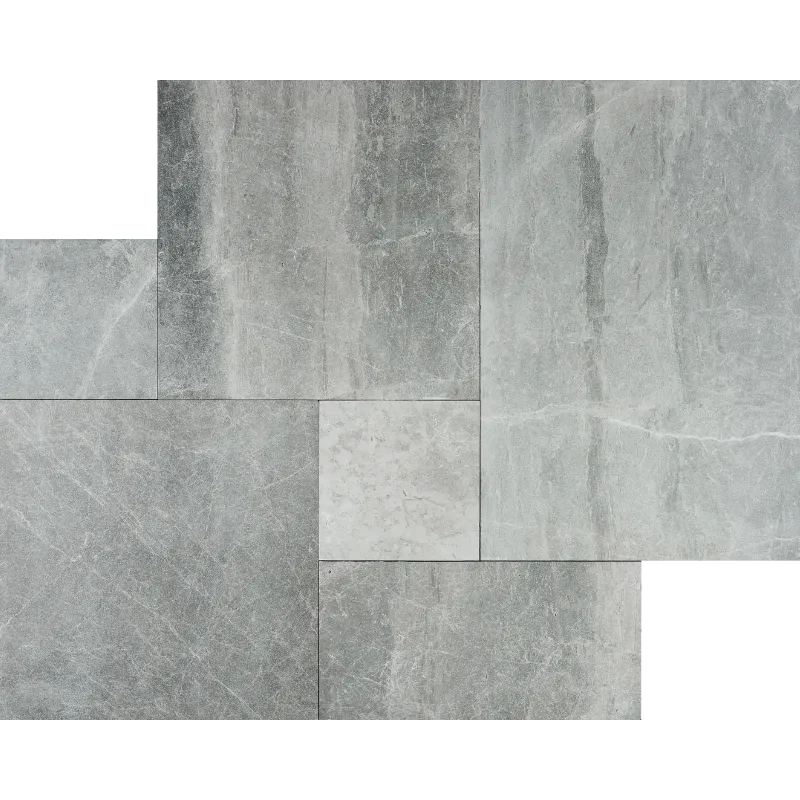
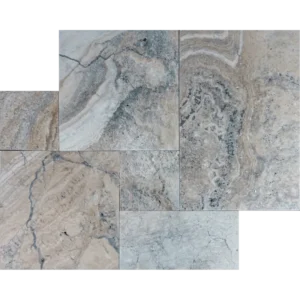
Storm Vein – French Pattern Leathered Marble Set showcases luxurious natural marble in soft gray and light silver tones, featuring subtle, cloudy veining for a modern, refined look. The leathered finish and tumbled edges add texture and slip resistance, making it ideal for elegant outdoor living spaces.
Perfectly arranged in a French Pattern layout, this marble set is a timeless choice for patios, pool decks, garden paths, and terraces. With a thickness of 1-1/4″, it provides outstanding durability for both residential and commercial installations.
Each set covers approximately 8 square feet, and a full crate contains 22 sets, totaling 176 square feet.
French Pattern Set Includes:
(2) pieces – 16″ x 16″
(1) piece – 16″ x 24″
(2) pieces – 8″ x 16″
(1) piece – 8″ x 8″
Installation Guide – Storm Vein French Pattern Leathered Marble Pavers
Tools & Materials Needed
Materials: crushed stone or gravel base, leveling sand or flexible thin-set mortar, joint filler (polymeric sand, fine sand, or grout), penetrating stone sealer, clean water.
Tools: tape measure, shovel, plate compactor, long level, rubber mallet, screed board, wet saw with diamond blade, grout float, spacers, broom, protective gear (gloves, goggles).
Step 1 — Base Preparation: Stable & Level Foundation
Excavate the area to accommodate paver thickness plus base layers.
Compact the soil thoroughly.
Spread and compact 4–6″ (100–150 mm) of crushed stone or gravel. For areas with vehicle traffic, increase to 8–12″ (200–300 mm).
Ensure proper drainage with a slope of ~1/4″ per foot (2%).
Apply a 1″ (25 mm) layer of leveling sand or 3/4–1″ (20–30 mm) mortar and screed smooth.
Step 2 — Dry Layout: Plan the French Pattern
Dry-lay the pavers to preview the French Pattern arrangement and mix tones evenly.
Mix pieces from multiple crates to achieve a natural, uniform appearance.
Mark centerlines or reference points for symmetry.
Plan edge cuts and corner placements before permanent installation.
Step 3 — Setting the Pavers: Sand-Set or Mortar-Set
Sand-Set Method:
Place pavers on the prepared sand bed.
Tap gently with a rubber mallet.
Check level with a long straightedge or level.
Install edge restraints to secure layout.
Mortar-Set Method:
Spread flexible thin-set mortar on the base.
Back-butter each paver for full adhesion.
Set pavers, tap lightly, and check level alignment.
Allow mortar to cure according to manufacturer’s instructions.
Step 4 — Joint Spacing: Functional & Elegant
Step 5 — Filling Joints
Sand-Set: Sweep polymeric or fine sand into joints.
Mortar-Set: Use non-sanded or flexible grout suitable for natural marble.
Remove excess material before it hardens.
Test filler on a small area first to prevent discoloration.
Step 6 — Sealing: Protection & Enhancement
Once joints are fully cured, apply a penetrating stone sealer to enhance color and protect against stains.
Test the sealer on a small area first.
Reapply every 1–3 years depending on traffic and exposure.
Avoid topical sealers that may alter texture or reduce slip-resistance.
Step 7 — Initial Cleaning & Curing
Avoid heavy traffic until mortar or joint filler is fully cured (24–72 hours).
Sweep and rinse gently to remove dust and debris.
Use only pH-neutral cleaners; avoid acidic or abrasive products.
Maintenance Tips
Sweep or rinse regularly to prevent dirt buildup.
Clean spills promptly to avoid staining.
Avoid salt or harsh chemical deicers.
Reseal periodically to maintain protection and appearance.
⚠️ Important Note: Storm Vein marble is natural stone; color, veining, and texture may vary. Always dry-lay and inspect pavers before final installation to ensure a harmonious and visually appealing layout.


