Loading... (Warehouse Local Time)
Mon–Fri: 9:00 AM – 6:00 PM |

Olea Polished Marble Mosaic Tile – Iceberg White

Brighten your interiors with the Olea Polished Marble Mosaic Tile. Crafted from Iceberg white marble, its polished finish and elegant geometric pattern add timeless sophistication to walls, backsplashes, and accent areas.

$17.49 / Piece

Item Code: MM123-18710 Category

720 Pieces in stock

Est. Coverage: 0.60 sq. ft. per piece | 3.00 sq. ft. per box | 214 sq. ft. per crate | Request Info
Note on Samples:
Sample pieces are small cut sizes, approximately 3" x 3" to 8" x 8", and intended for color and finish reference only.
If you need a full-size sample, please contact us.

Request Custom Pricing for Large Orders

Planning a large project? Orders over 500 sq. ft., full crates, or commercial applications may qualify for exclusive volume pricing. Reach out today and let us provide a custom quote tailored to your needs.

Request Volume Quote
  • Volume pricing available for qualified bulk orders.
  • We offer custom sizes, finishes, and crate-based shipments.

Color & Finish Options

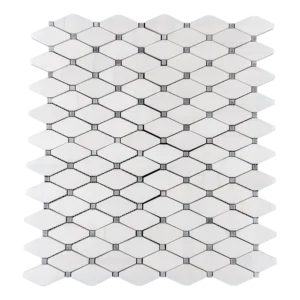
Iceberg Olea Marble Mosaic Tile – 6.7″ x 12.8″ Polished Finish

Contemporary Elegance in Pristine White Marble

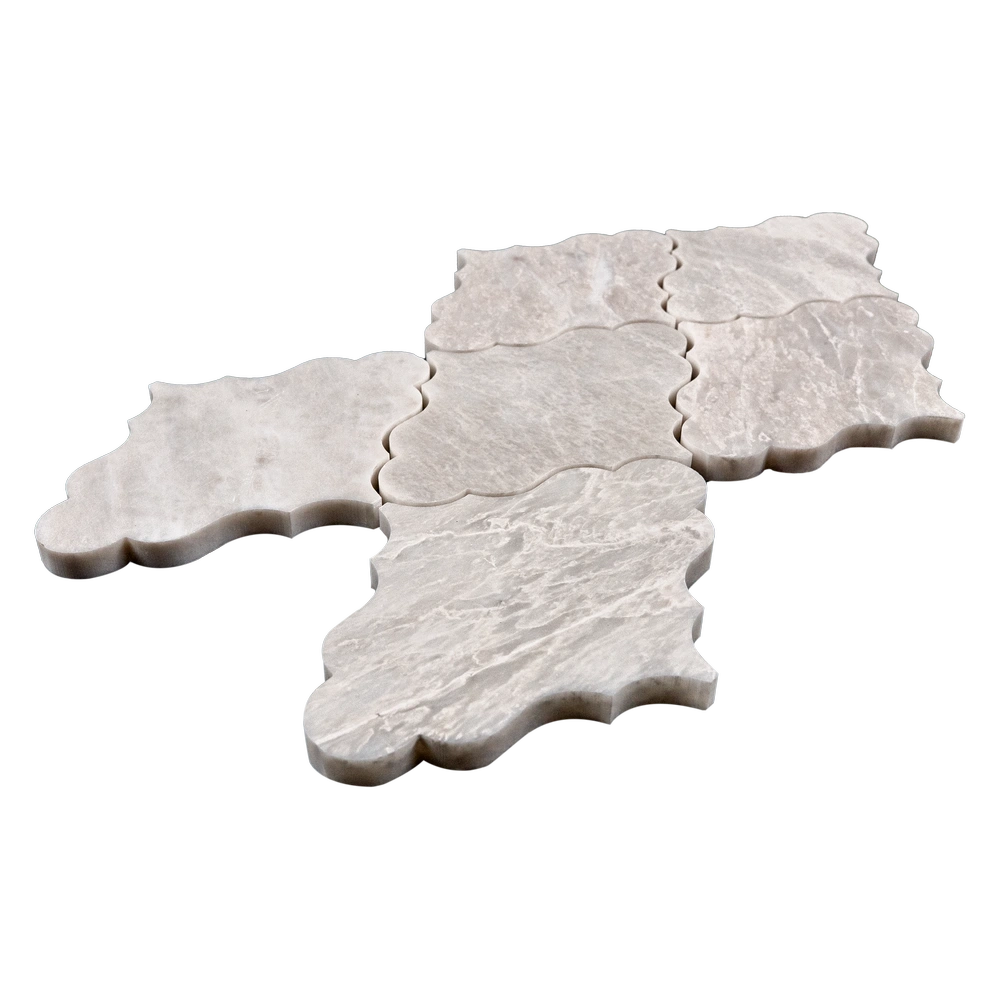
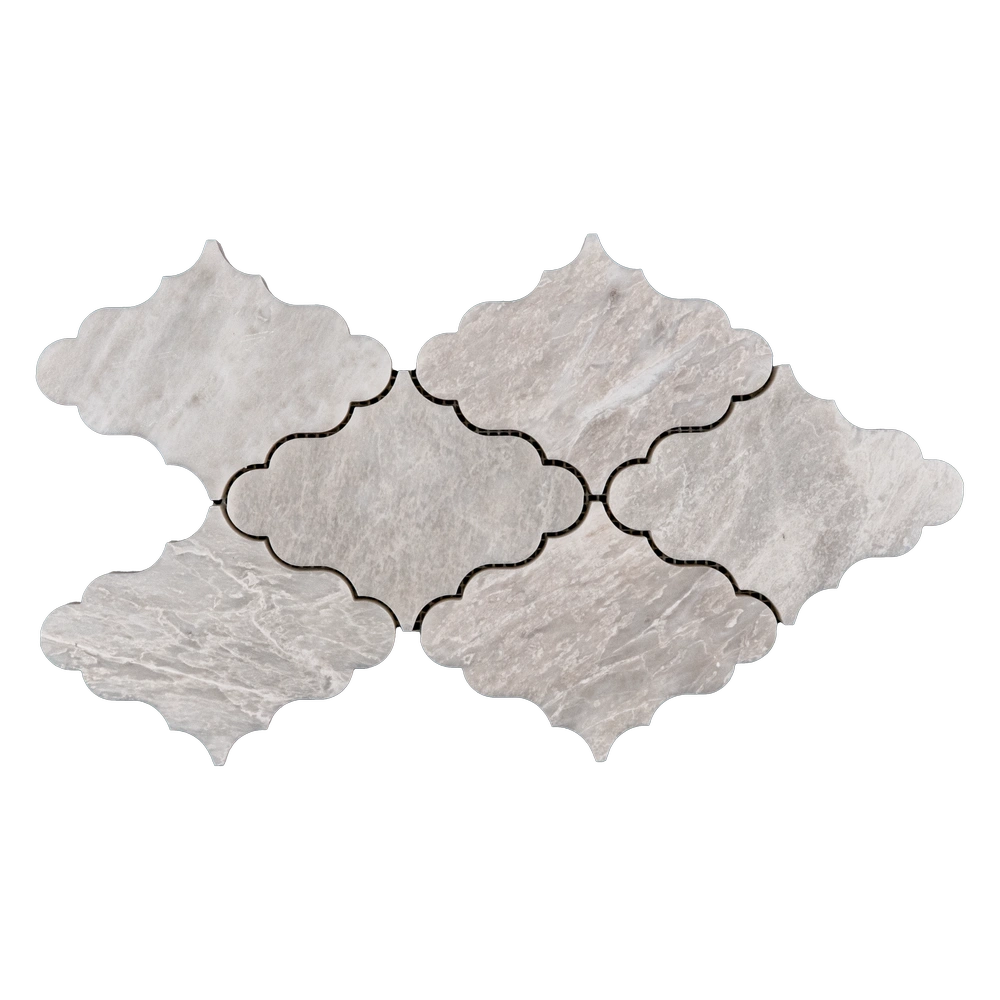
Elevate your interiors with the Iceberg Olea Marble Mosaic Tile, featuring 6.7″ x 12.8″ sheets of premium Iceberg marble. Polished to a radiant sheen, each sheet highlights subtle icy veining and pure white tones, while the flowing Olea pattern adds a graceful, modern rhythm to any wall surface.

The polished finish amplifies natural light, creating brighter, more open-feeling spaces—ideal for luxurious bathroom walls, sophisticated kitchen backsplashes, or stylish accent areas. The durable marble construction ensures long-lasting beauty, while the mesh backing allows for quick and precise installation. Whether your design is modern, transitional, or classic, this mosaic tile enhances every interior with timeless elegance.

Product Highlights

  • Material: Premium Iceberg Marble

  • Color: Pristine white with delicate icy veining

  • Finish: Polished for a reflective, luminous surface

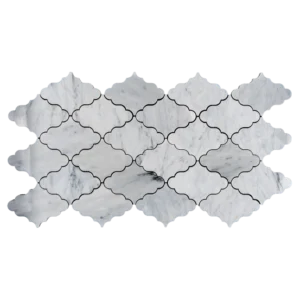
  • Pattern: Olea – contemporary, flowing design

  • Sheet Size: 6.7″ x 12.8″ (17 x 32.5 cm)

  • Thickness: ~0.4″ (1 cm)

  • Installation: Mesh-mounted for seamless alignment and easy installation

  • Use: Perfect for indoor walls—backsplashes, bathrooms, accent walls, and more

Why Choose Iceberg Olea Marble Mosaic?

  • Timeless Design: Combines natural marble beauty with modern flow

  • Polished Finish: Enhances subtle veining and reflects light beautifully

  • Durable & Versatile: Long-lasting marble suitable for high-traffic areas

  • Effortless Installation: Mesh backing ensures precise placement and alignment

Installation & Maintenance Tips

  • Use a premium white thin-set mortar for secure adhesion

  • Seal after installation to protect against stains and moisture

  • Use non-sanded grout to maintain the polished surface

  • Clean regularly with a gentle, pH-neutral stone-safe cleaner

Packaging & Coverage

  • Sold per box – 5 mesh-mounted sheets per box

  • Coverage: approx. 3.00 sq. ft. per box

  • Weight: ~24.2 lbs per box

  • Packaged carefully for safe delivery

Weight4.82 lbs
Dimensions6.7 × 12.8 × 0.40 in
Collection

Iceberg Collection

Color

, ,

Design

Olea, Waterjet Decos

Finish

Material

Size (inches)

Thickness

Usage Area

Backsplash, Commercial Interior Walls, Outdoor Walls, Residential Interior Walls, Shower Walls

Installation Guide – Step by Step

Step 1: Surface Preparation – Start with a Perfect Base

Thoroughly clean and dry the surface, removing dust, oils, or residues that could compromise adhesion.
Ensure the substrate is solid, level, and free of cracks—imperfections can affect the tile’s alignment and finish.
For wet areas such as showers or kitchen backsplashes, apply a high-quality waterproofing membrane to protect the marble from moisture.
Remove any obstructions, including outlet covers, trims, or moldings, that might interfere with installation.
Use a self-leveling compound if necessary to create a completely flat, even surface—foundation quality ensures flawless results.

Step 2: Layout Planning – Highlight the Marble’s Natural Beauty

Locate the center of your installation area to maintain a balanced and symmetrical pattern.
Dry-lay several sheets to visualize the flow of the tile and ensure consistent veining across sheets.
Adjust placement to avoid small cuts at edges or corners, maintaining a seamless look.
Use 1.5–3 mm spacers between sheets for uniform grout lines and polished alignment.

Step 3: Adhesive Application – Secure with Care

Recommended Thin-Sets for Natural Stone:

  • Mapei – dependable, high-quality adhesion

  • Laticrete – professional-grade, easy to work with

  • Ardex – reliable for premium stone installations

Instructions:

  • Use a white, non-staining thin-set mortar to protect the tile’s polished finish.

  • Mix small batches for smooth application and use within 30 minutes.

  • Apply adhesive with a 1/4″ notched trowel, using the flat side first to coat, then comb at 45° for consistent coverage.

  • Back-butter each sheet to ensure full contact and reduce lippage.

  • Work in sections to prevent the thin-set from drying before sheets are laid.

Step 4: Cutting & Fitting – Precision and Care

  • Use a wet saw with a fine diamond blade to make clean, chip-free cuts.

  • Mark cuts accurately with a pencil for exact alignment.

  • Smooth edges with a stone file or rubbing block to preserve the polished finish.

  • Dry-fit sheets in tricky areas to confirm the design and veining match before final placement.

Step 5: Setting Tiles – Achieve Perfect Alignment

  • Begin at the center and work outward to maintain symmetry.

  • Gently press mesh-backed sheets into the adhesive, aligning them carefully.

  • Use spacers to keep grout lines consistent.

  • Tap lightly with a rubber mallet to level tiles and eliminate air pockets.

  • Wipe off excess adhesive immediately with a damp sponge.

  • Allow the adhesive to cure for at least 24 hours before grouting.

Step 6: Grouting & Sealing – Protect and Shine

  • Use non-sanded grout to protect the polished surface.

  • Apply grout diagonally with a rubber float, pressing into joints completely.

  • Remove excess grout with a damp sponge promptly to prevent haze.

  • Buff the surface with a dry microfiber cloth after 15–20 minutes.

  • Let grout cure 72 hours, then apply a penetrating, marble-safe sealer to safeguard against moisture, stains, and etching.

Maintenance Tips – Preserve Its Luster

  • Clean only with pH-neutral stone-safe products.

  • Avoid acidic or abrasive cleaners that can dull the marble’s shine.

  • Reseal periodically depending on usage and moisture exposure.

  • Use felt pads under furniture to prevent scratches.

Shipping & Packaging – Careful Handling

Each mosaic sheet is securely packaged with cushioning to prevent breakage during shipping. The mesh backing ensures accurate alignment and easy installation.

Important Note – Celebrate Natural Variation

Every Olea Polished Iceberg White Marble Mosaic sheet has unique veining and subtle tonal differences, ensuring a one-of-a-kind installation. Professional installation is strongly recommended. Stonemarket USA is not responsible for improper installation or damage caused by non-professional methods.

Category
Category
Material
Material
Color
Color
Size
Size
Finish
Finish
Design
Design
Thickness
Thickness
Application
Usage Area
Request a Quote
Tell us briefly about your project, sq ft, and timing.