Loading... (Warehouse Local Time)
Mon–Fri: 9:00 AM – 6:00 PM |

Beige Diamond 1×1 Square Marble Mosaic Tile – Polished Beige

Enhance your interiors with the sophisticated Beige Diamond Polished Marble Mosaic Tile. With a polished surface and elegant beige-gray veining, this premium natural stone tile adds timeless charm to kitchens, bathrooms, and accent walls. Durable, moisture-resistant, and easy to install, it’s perfect for both residential and commercial spaces.

$8.99 / Piece

Item Code: MMS20-9834 Category

720 Pieces in stock

Est. Coverage: 1.00 sq. ft. per piece | 5.00 sq. ft. per box | 360 sq. ft. per crate | Request Info
Note on Samples:
Sample pieces are small cut sizes, approximately 3" x 3" to 8" x 8", and intended for color and finish reference only.
If you need a full-size sample, please contact us.

Request Custom Pricing for Large Orders

Planning a large project? Orders over 500 sq. ft., full crates, or commercial applications may qualify for exclusive volume pricing. Reach out today and let us provide a custom quote tailored to your needs.

Request Volume Quote
  • Volume pricing available for qualified bulk orders.
  • We offer custom sizes, finishes, and crate-based shipments.

Color & Finish Options

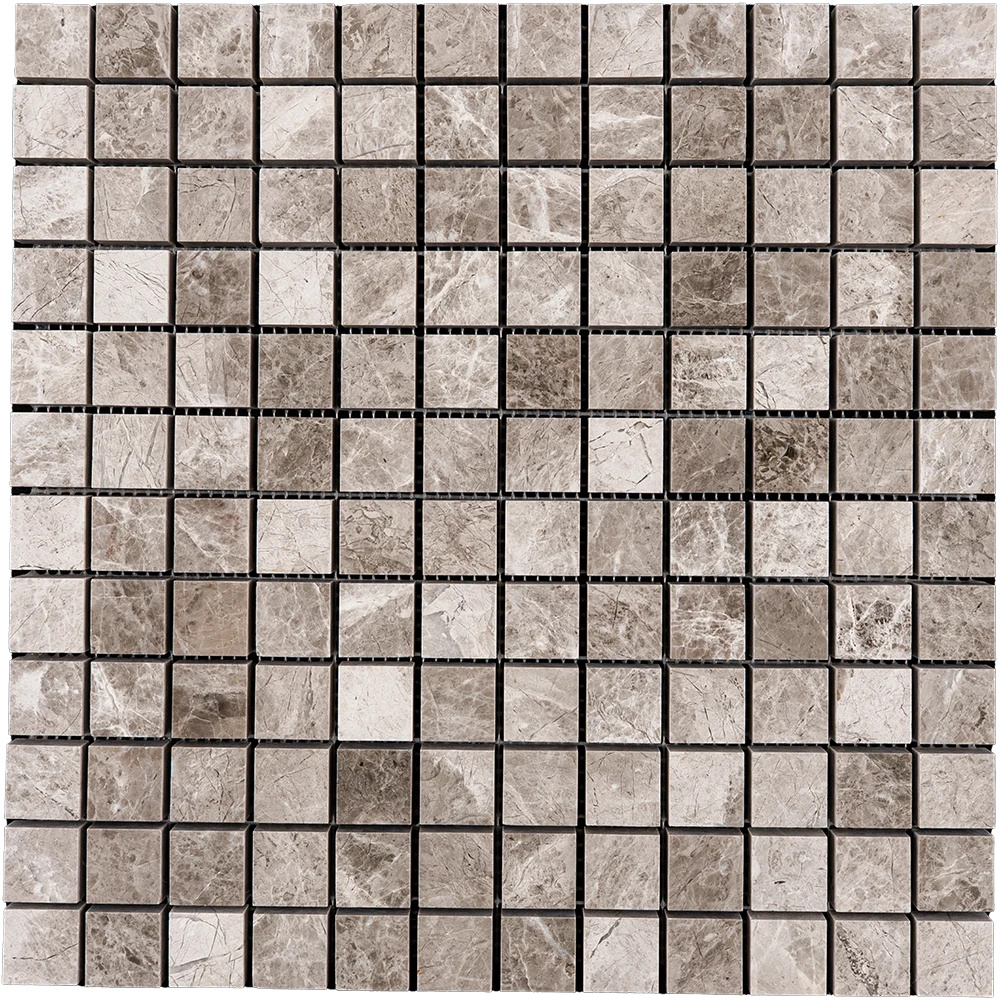
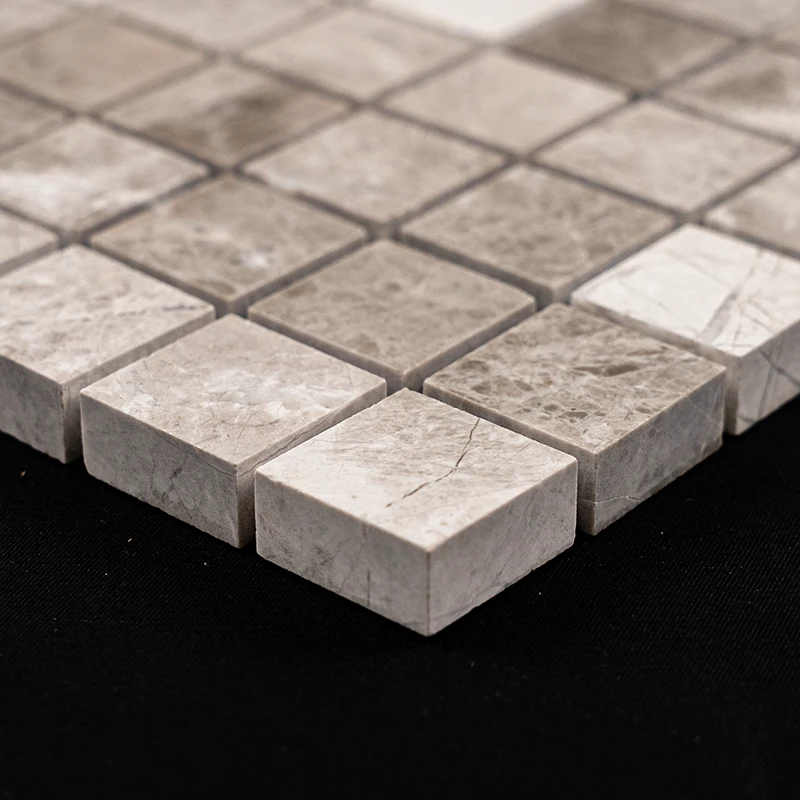
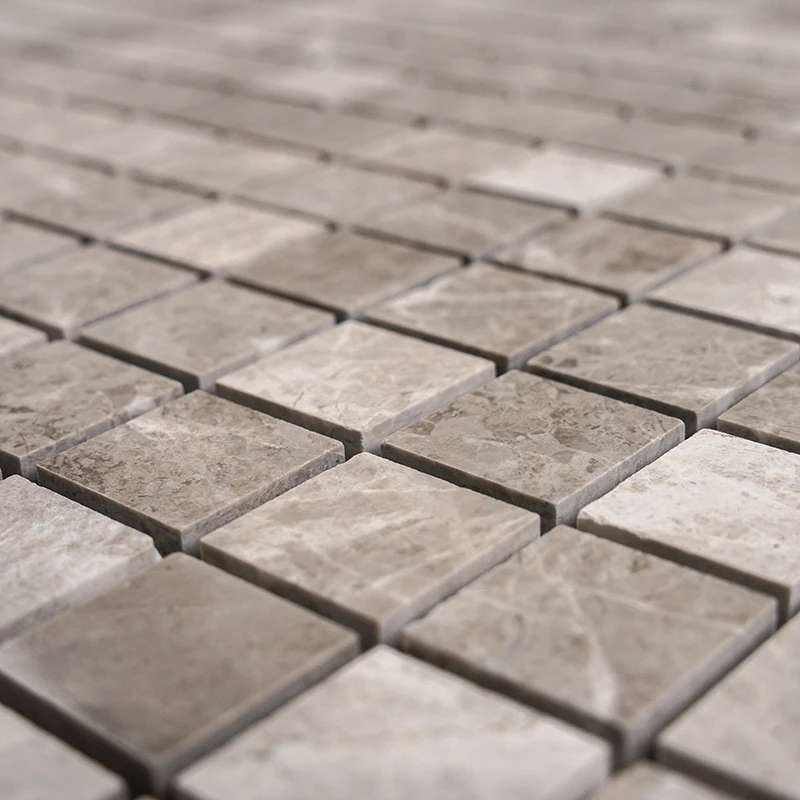
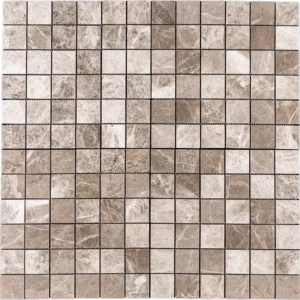
Beige Diamond Polished Marble Mosaic Tile 1×1

Elevate Your Interiors with Timeless Beige Diamond Marble

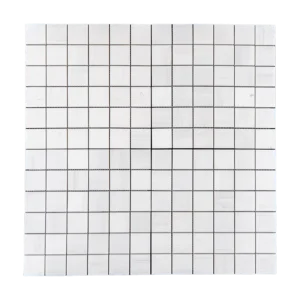
Bring a touch of luxury to your spaces with the Beige Diamond Polished Marble Mosaic Tile. Featuring a polished finish and elegant beige-gray veining, this premium natural stone tile enhances both modern and classic interiors. Its durable and stylish design makes it perfect for walls, backsplashes, bathrooms, and decorative accent features.

Product Details

  • Material: Premium Natural Marble

  • Tile Size: 12″ x 12″ (1 ft x 1 ft)

  • Chip Size: 1″ x 1″

  • Thickness: 3/8″ (10 mm)

  • Finish: Polished – glossy and reflective

  • Color: Beige Diamond (gray with natural veining)

  • Mesh Backing: Yes, for easy and precise installation

Why Choose Beige Diamond Marble Mosaic?

  • Timeless Elegance: Natural beige-gray marble with a polished, luxurious surface.

  • Versatile Use: Perfect for kitchens, bathrooms, shower walls, backsplashes, and accent walls.

  • Durable & Strong: Resistant to moisture, wear, and impact.

  • Easy Installation: Pre-mounted on mesh backing for seamless application.

  • Low Maintenance: Easy to clean, stain-resistant, and long-lasting.

Ideal Applications

  • Bathroom Walls & Showers: Creates a sleek, spa-inspired look with water-resistant properties.

  • Kitchen Backsplashes: Adds a high-end, polished finish that’s easy to maintain.

  • Feature Walls & Fireplaces: Enhances depth and texture in living spaces.

  • Hotels & Commercial Spaces: Suitable for lobbies, restaurants, and luxury office interiors.

  • Outdoor Covered Areas: Works well for patios, pool surrounds, and walkways.

Elevate your design with the sophisticated charm and enduring beauty of Beige Diamond Polished Marble Mosaic Tile.

Weight5.6 lbs
Dimensions12 × 12 × 0.40 in
Size (inches)

Finish

Thickness

Color

, ,

Chip Size (Inches)

Collection

Beige Diamond Collection

Design

Square

Material

Usage Area

Backsplash, Commercial Interior Walls, Outdoor Walls, Residential Interior Floors, Residential Interior Walls, Shower Floors, Shower Walls

Maximize the Performance of Your Beige Diamond Polished Marble Mosaic Tile 12×12

Ensure a flawless and long-lasting installation by following these essential steps for preparing, installing, and finishing your Beige Diamond Polished Marble Mosaic Tile 12×12. Proper installation enhances both durability and the natural elegance of the stone.


Step 1: Surface Preparation

  • Clean, dry, and debris-free substrate; remove wax, grease, and soap residue.

  • Ensure the surface is level, structurally sound, and free of cracks or loose areas.

  • Apply waterproofing in moisture-prone areas.

  • Remove moldings or any obstructions that may interfere with tile placement.

  • If needed, use a self-leveling compound to create an even surface before installation.

Step 2: Layout Planning

  • Measure the area and mark the center points of all four walls.

  • Snap chalk lines to create a precise grid for tile alignment.

  • Dry-lay tiles along the center lines in both directions to ensure balance.

  • Adjust center lines if edge cuts are too small.

  • Use tile spacers for uniform grout lines.

Step 3: Selecting & Applying Adhesive

Recommended Adhesives: High-quality white thin-set mortars such as Mapei, Laticrete, or Ardex.

Application:

  • Mix only as much mortar as can be used within 30 minutes.

  • Apply a 1/4-inch adhesive layer with the flat side of a notched trowel.

  • Comb the mortar at a 45-degree angle for even ridges.

  • Work in small sections (approx. 2’ x 3’) to prevent drying before tile placement.

  • For moisture-sensitive stones, follow manufacturer recommendations for setting materials.

Step 4: Cutting & Fitting Tiles

  • Mark tiles accurately with a pencil or marker.

  • Use a tile cutter for straight cuts and a wet saw with a diamond blade for precision.

  • Smooth rough edges with a rubbing stone.

  • For curves, use a tile nipper for gradual trimming.

  • Dry-fit all tiles to ensure proper alignment before setting in mortar.

Step 5: Setting the Tiles

  • Start from the center of the area and work outward within each grid.

  • Place tiles with a slight twisting motion to ensure a strong bond.

  • Avoid sliding tiles to prevent mortar displacement.

  • Maintain consistent grout joints using spacers.

  • Gently tap tiles with a rubber mallet for even placement.

  • Remove excess mortar immediately with a damp sponge.

  • Allow adhesive to cure for at least 24 hours before grouting.

Step 6: Grouting & Finishing

  • Remove spacers before applying grout.

  • Use high-quality, unsanded grout suitable for polished marble.

  • Spread grout diagonally with a rubber float, filling all joints completely.

  • Wipe off excess grout immediately.

  • After 15–20 minutes, clean haze with a damp sponge.

  • Let grout cure 72 hours before heavy use.

  • Apply a penetrating sealer after grout has cured to protect against moisture and stains.


Maintenance Tips

  • Clean with pH-neutral stone cleaners to preserve the marble’s natural shine.

  • Avoid acidic or abrasive cleaners that can damage the surface.

  • Reseal periodically to maintain durability and appearance.

  • Use felt pads under furniture to prevent scratches.


Important Notice

  • Stonemarket USA is not responsible for improper installations.

  • For best results, hire a professional tile installer and use premium-grade materials.

  • For questions, contact Stonemarket USA Customer Support at [your contact information].

Following these guidelines ensures your Beige Diamond Polished Marble Mosaic Tile 12×12 retains its beauty and elegance for years to come.

Category
Category
Material
Material
Color
Color
Size
Size
Finish
Finish
Design
Design
Thickness
Thickness
Application
Usage Area
Request a Quote
Tell us briefly about your project, sq ft, and timing.